Using VSCode with Git and SSH to Complete/Submit a programming Assignment
Before starting, you should have completed the VScode Setup Guide with SSH. This guide assume you have VScode and SSH capabilities installed, as well as the VSCode extension Remote Development Extension.
-
Accept the GitHub classroom assignment and follow the link to the repository. For example, if you are working on Lab 1, after accepting the assignment, you’ll have a new repository named
lab-1-usernamewhereusernameis your GitHub username. The assignments can all be found on the schedule page. -
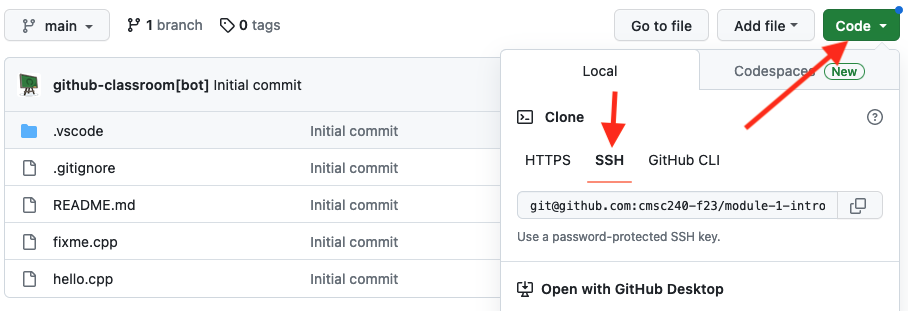
Copy the repository link by clicking the
Codebutton and then theSSHlabel, followed by thecopy/pastebutton. You should have already set up an ssh key by following this guide.
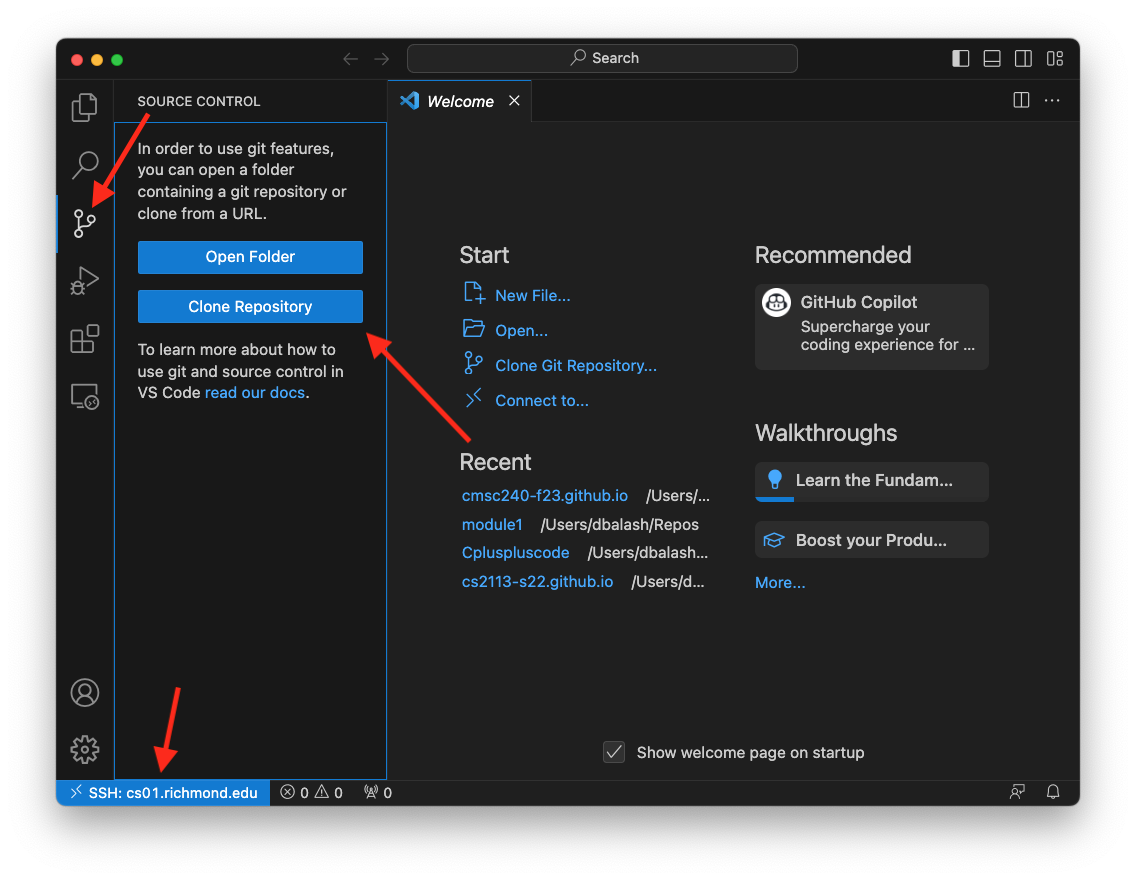
- In a VSCode window where you have connected remotely to a Linux machine, cs01-cs06 (refer to this guide). Click the
Source Controlicon on the left hand side. Then click theClone Repositorybutton.
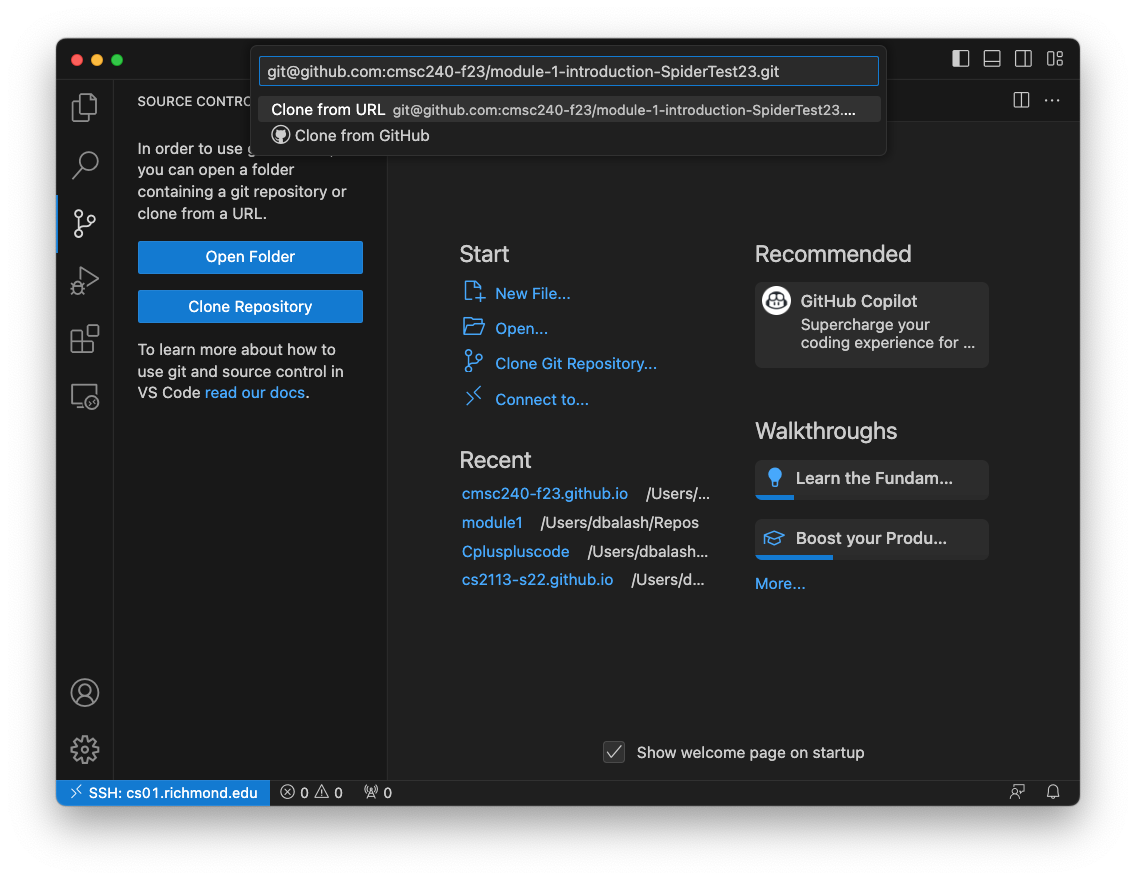
- Paste the repository link that you copied in step 2 in the command pallet.
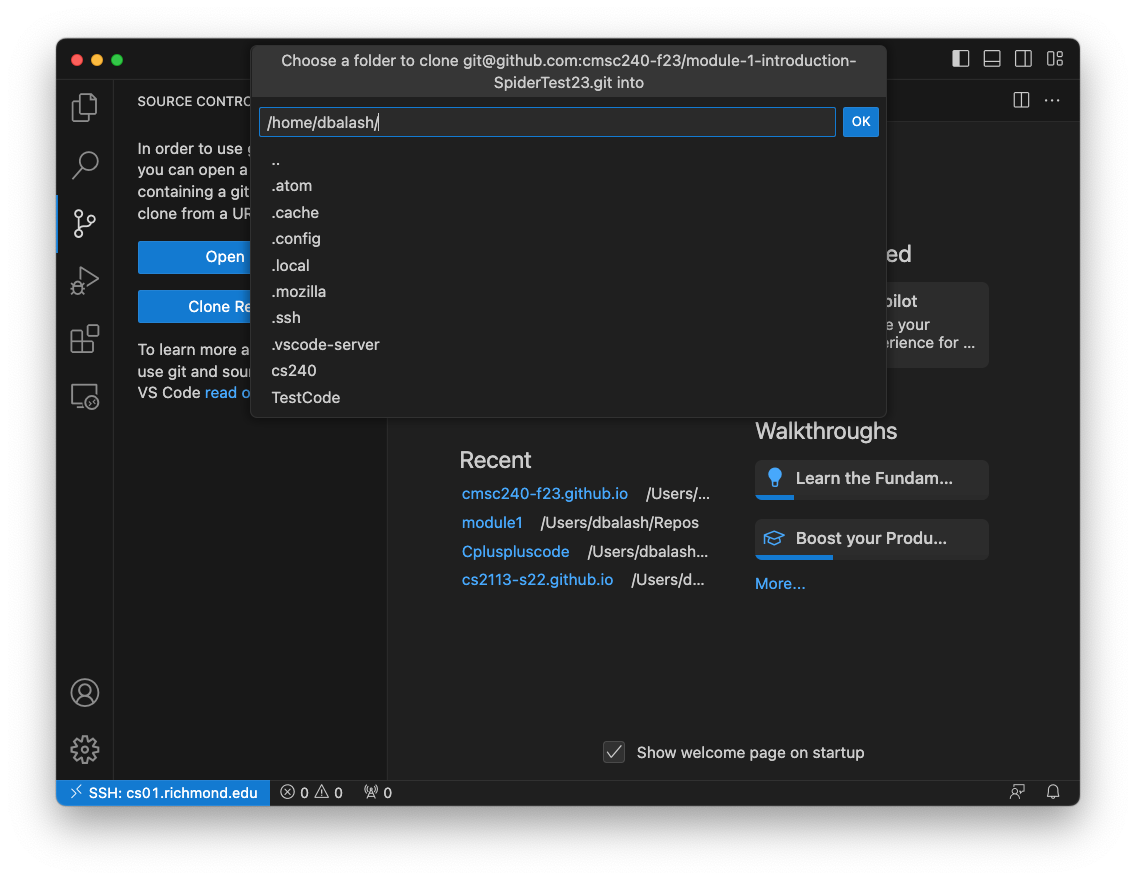
- Choose a folder where you want to clone the repository. Save it wherever you want, but I like to create a folder called
Reposorcs240to save my projects.
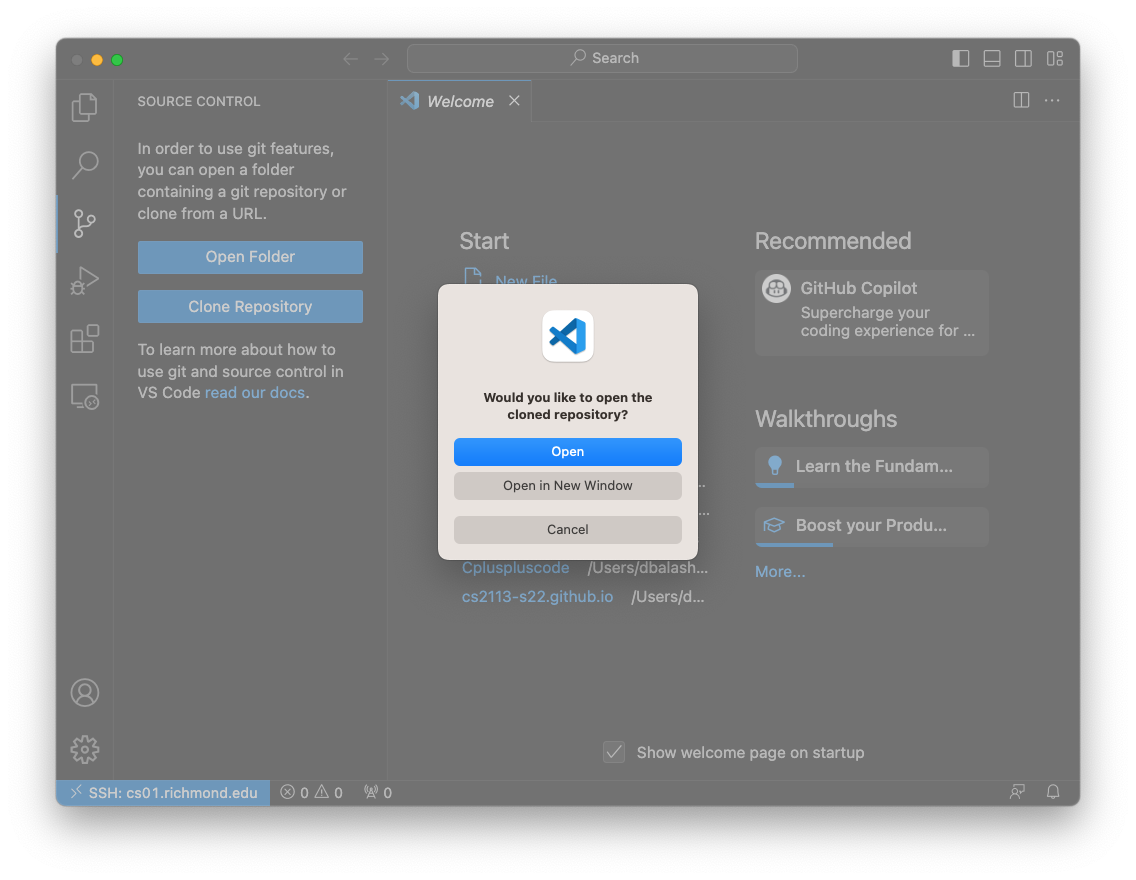
- Go ahead and open the repo in this window by selecting
Open
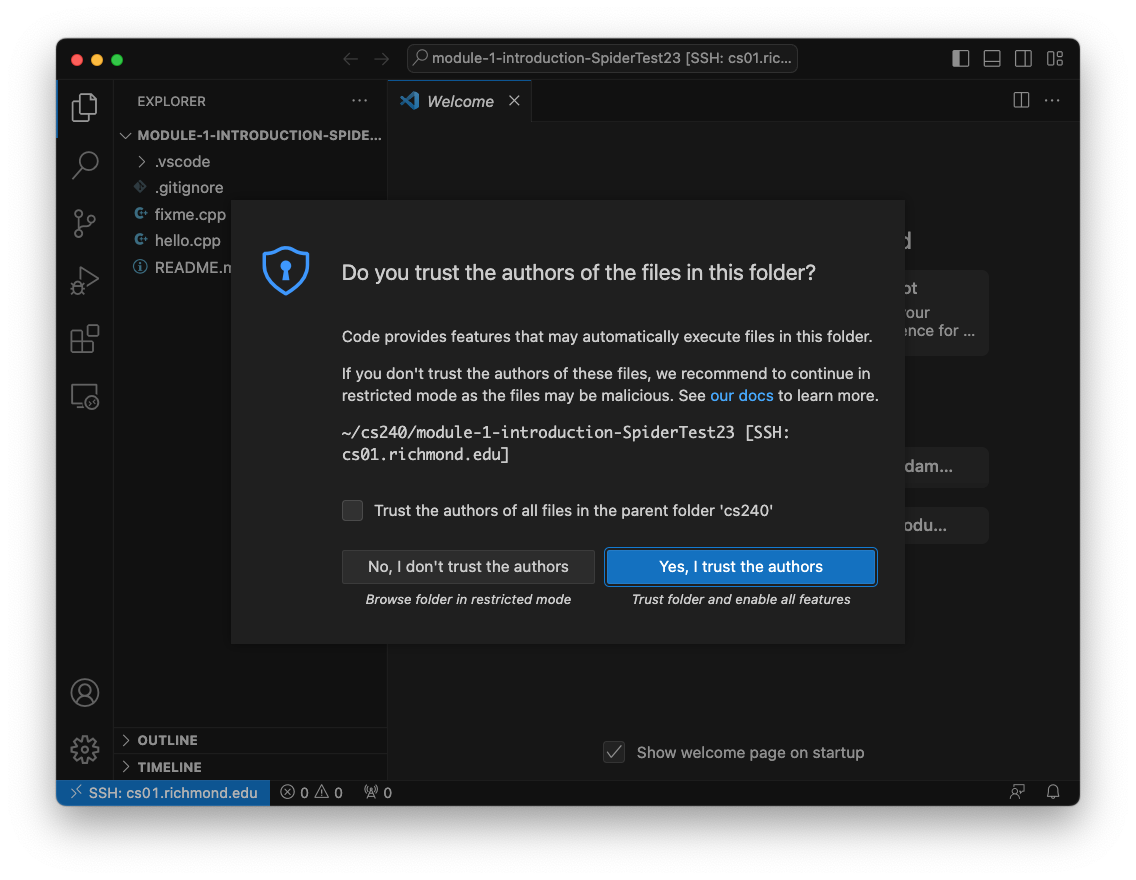
- Click Yes, I trust the authors to continue.
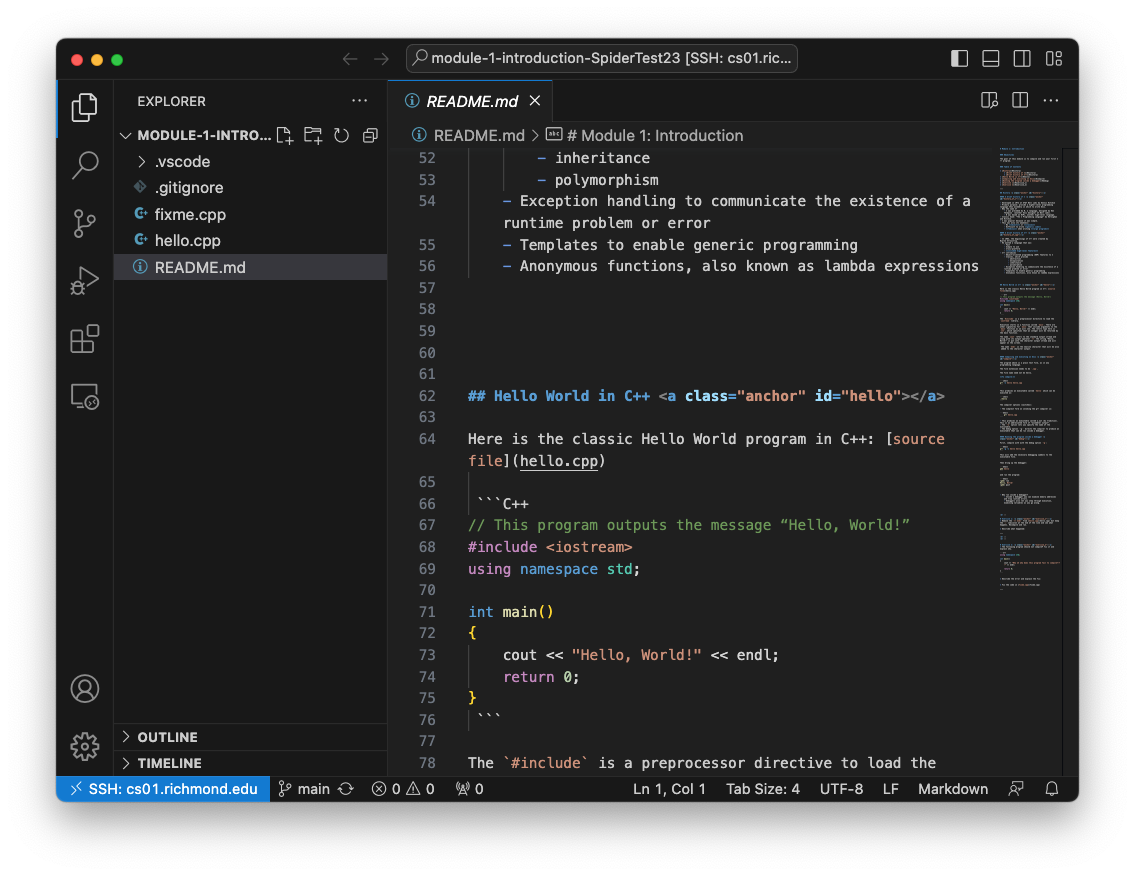
- Once complete, you’ll have your workspace ready to go.
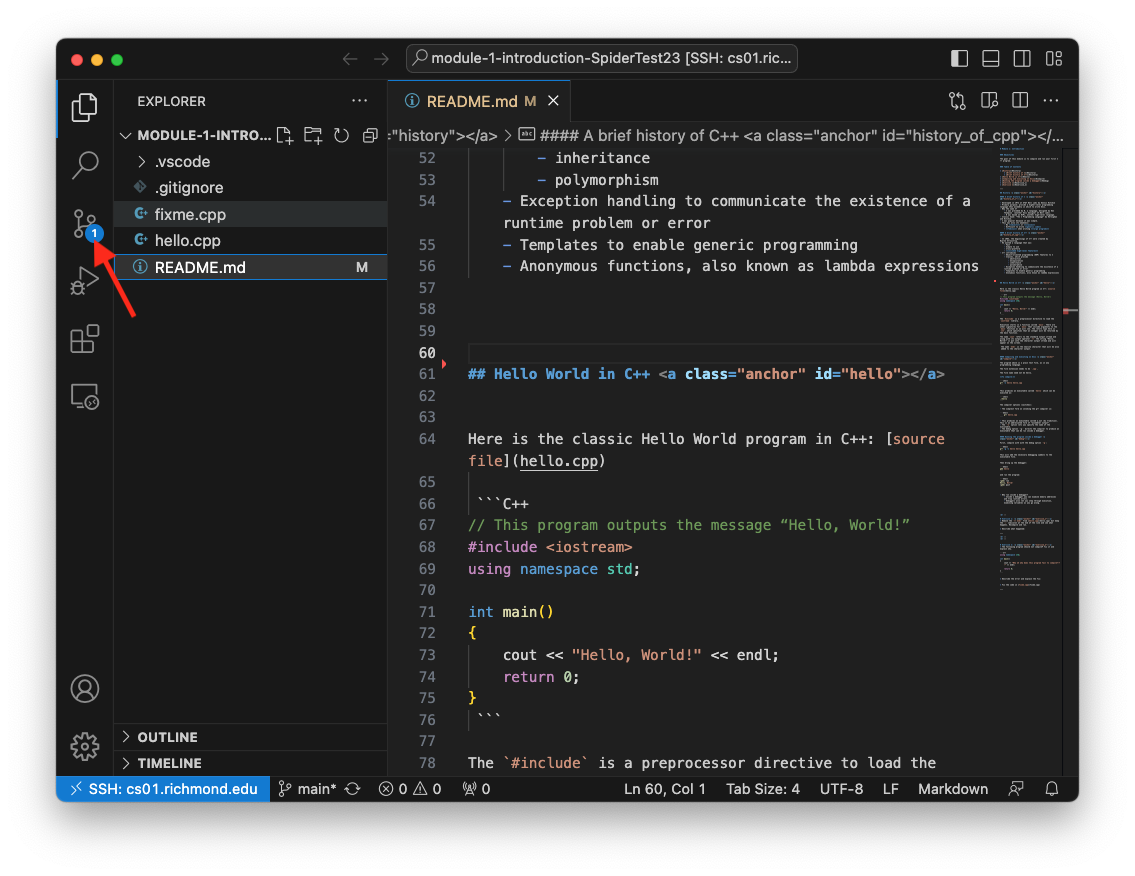
- Do your work. Save your changes. And once done, you need to commit your work. Start by clicking on the
Source Controlsymbol on the left.
- Add the modified files (or new files) to be staged for commit by pressing the
+next to the files you want to add.
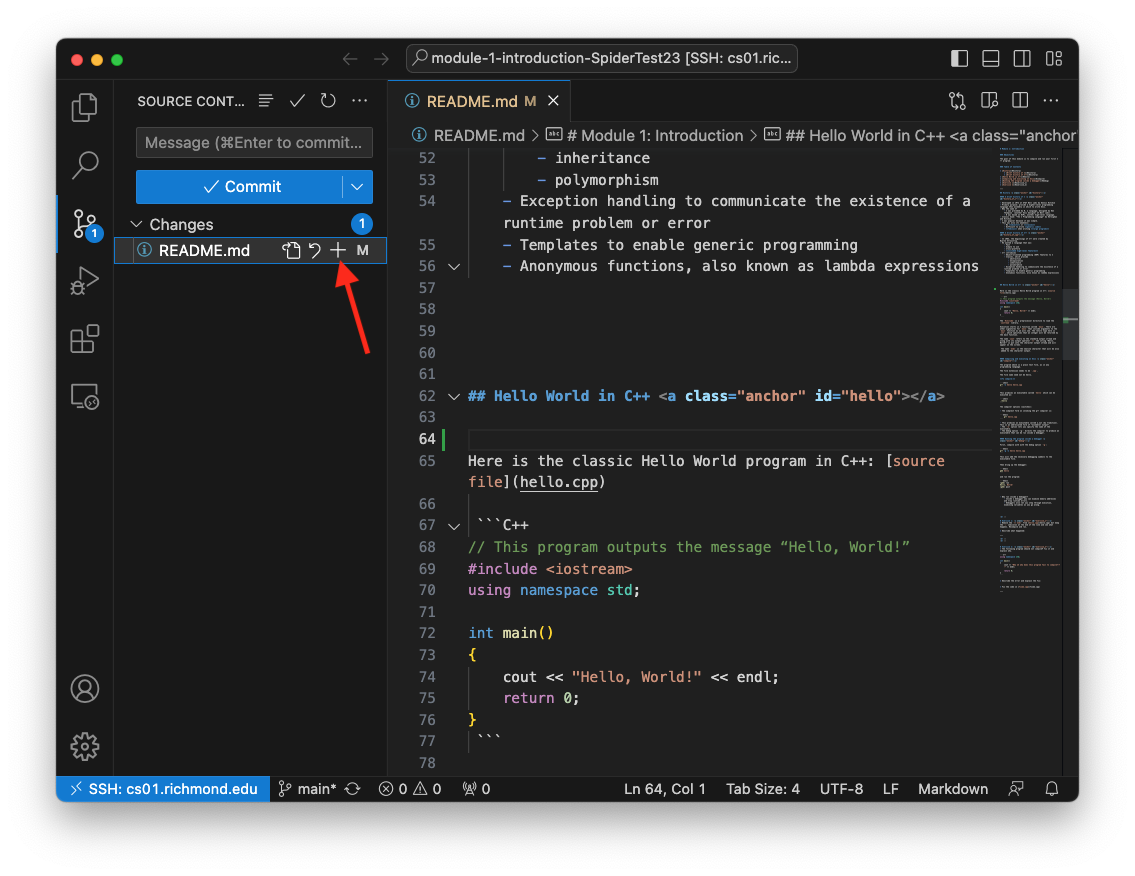
- The files are now staged.
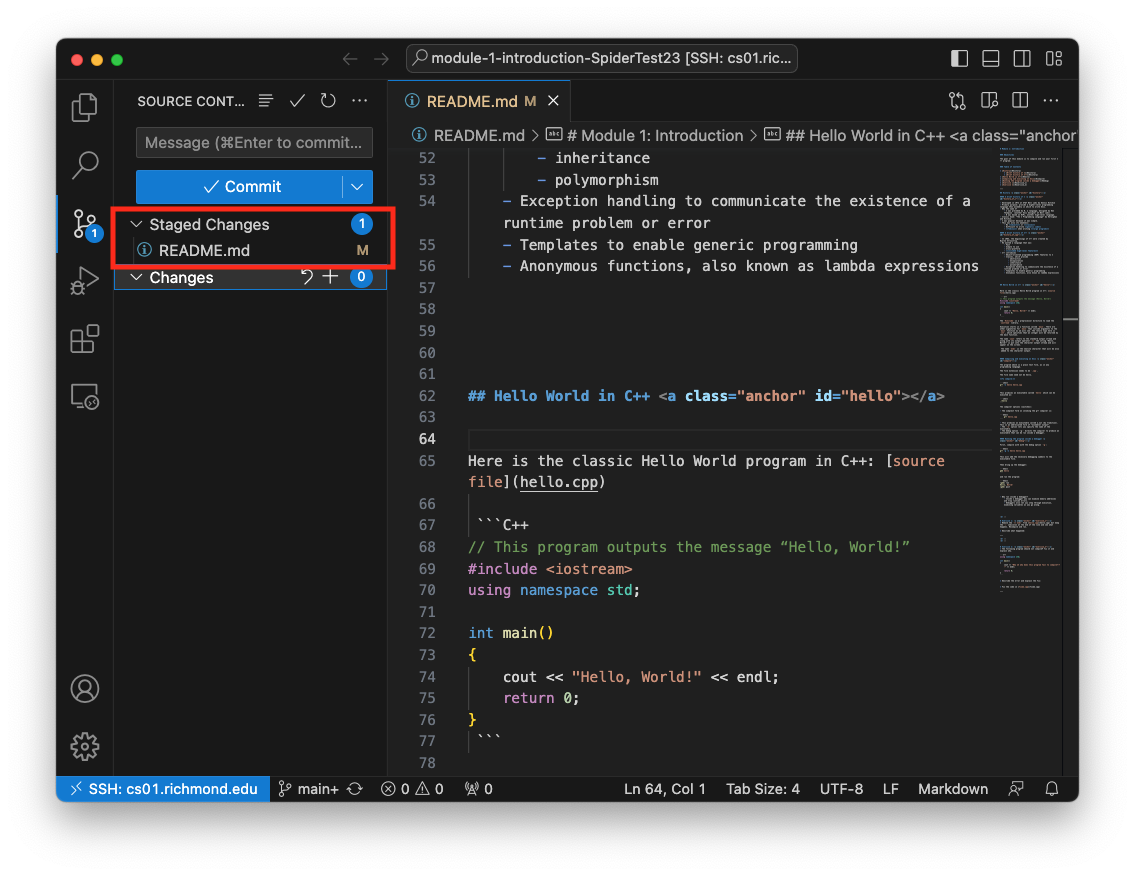
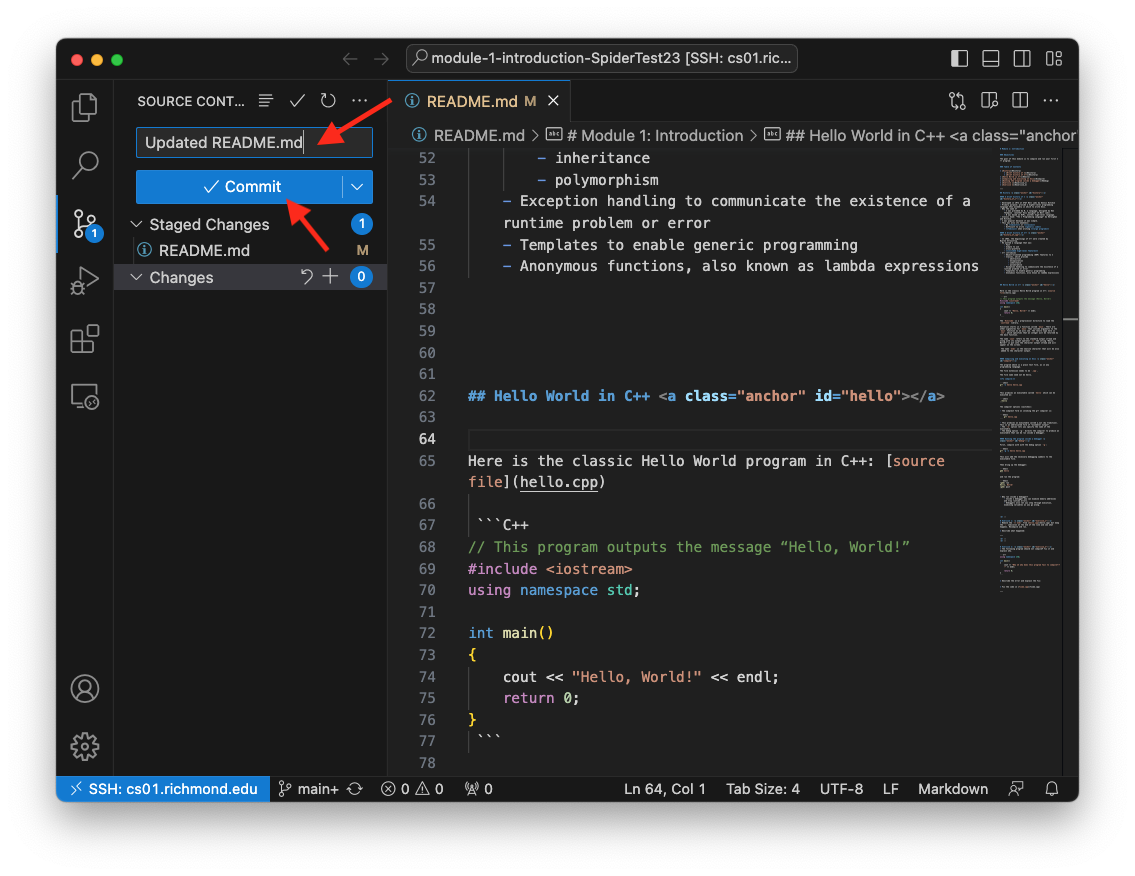
- Type a message in the text area above the
Commitbutton. Click the ✓Commitbutton to perform the commit.
- Finally, push your changes to GitHub by clicking the
...button, followed by selectingPushfrom the dropdown menu.
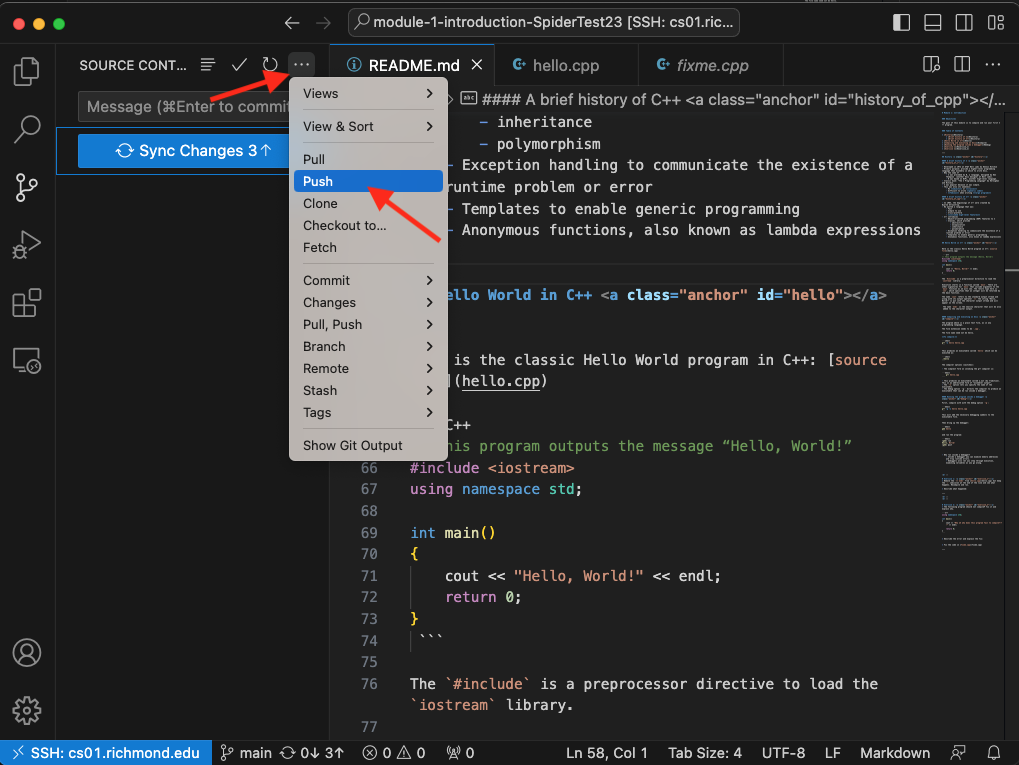
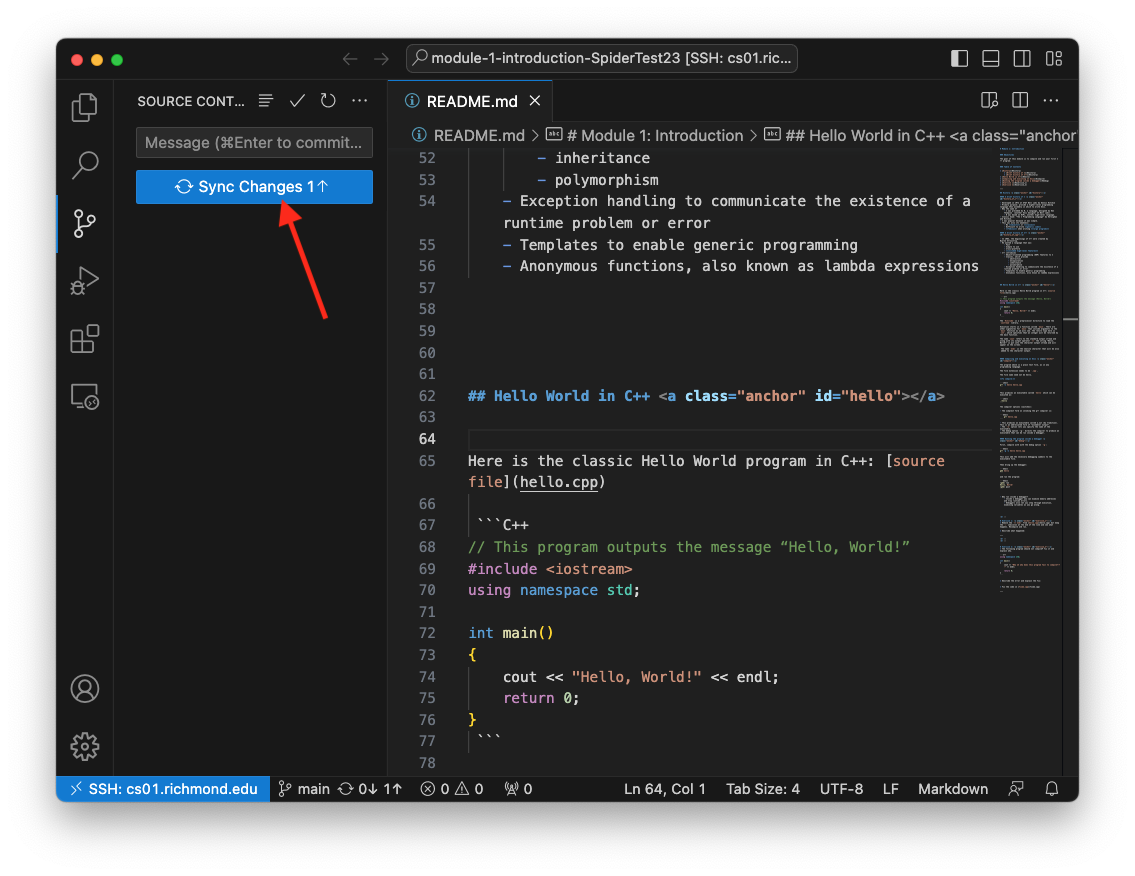
- Alternatively, you could click the
Syncbutton, which will both push your changes, and pull down any changes to the repository that exist on GitHub.
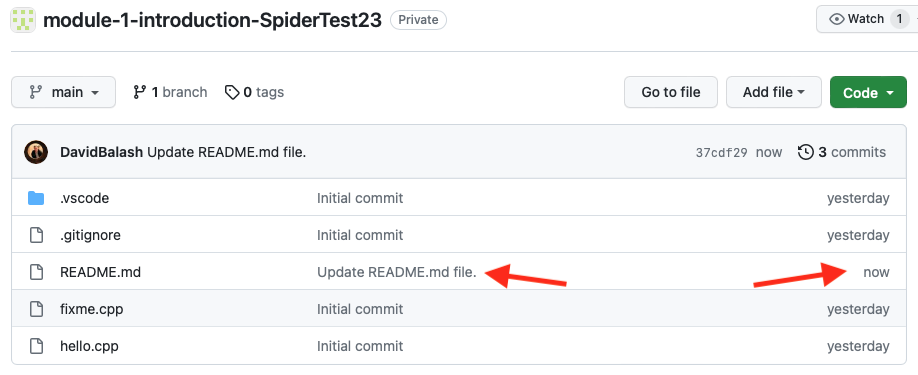
- Finally, finally, you should go back to GitHub as a final check to make sure you pushed all your changes.
Using the git command line in the integrated terminal
You can also use the command line to do the git commands.
git add file.txt        #add a file to the commit
git commit -m "message" #perform the commit with the commit message
git push                #push the commit to GitHub
If you want to add all the files that have been modified and commit all at once, use the following
git commit -a -m "message"
Asking you to set up your git profile?
If you’re getting a error saying you need to setup your name and email, then open the integrated terminal on your remotely connected (cs01 - cs06) VSCode window. Then follow the steps below.
You only need to do this once
- In the terminal run the following commands
git config --global user.name "JohnDoe23" git config --global user.email johndoe@example.com git config --global pull.rebase false- Where
JohnDoe23is replaced with your GitHub username andjohndoe@example.comis replaced with the email address you used to sign up to GitHub
- Where
- To verify your settings run the following command.
git config --list - Done.